Corona Blues? Make a remote video!
I am sending good thoughts to all my readers and bass friends.❤️
It’s been a challenging time for so many due to a variety of reasons, including health challenges, dealing with isolation, difficult care-taking situations, not being able to work or working overdrive and double shifts, and more. Big thanks and applause to all the health care and front-line professionals, as well as people involved in vital services. You are our true heroes!
When this crisis first hit, I knew that for me to stay sane during the shut down, I had to do something creative to keep my spirits up.
Be Creative!
Creativity has always helped me keep my sanity. Due to the quarantine, I soon began missing playing live with my bandmates. So I thought, what if we did a remote video collaboration to lift everyone’s spirits? They loved the idea! But being locked down meant some could not get to their rehearsal spaces, access pro-gear, or their crew.
But, as musicians, we know how to improvise!
First let me show you the result, which – thanks to Lara Price’s initiative – we used to help raise funds for our favorite non-profit (nextdoorsolutions.org, a non-profit against domestic violence, for whom we have played many shows).
How did we do it?
Let me preface this by saying there might be apps and better processes out there to do this. But this is how we did it. (Video pros, please chime in below in the comments.) I was lucky to have top-notch sound with Wolf at the board!
1 – Adapt the arrangement
Video and live are not the same. We shortened some sections and determined a bar length for solos that are often open when live.
2 – Create a scratch track for others to play to
Wolf and I created an overview in Logic, marked out the parts with loud claps and created a tempo map (the song has a tempo change). I recorded the bass (audio and video), and some organ pads, set to the click track.
3 – Finishing the Rhythm Section
This scratch track went to Robin, our drummer, and Janice on keys. Wolf added the guitar. We mixed them together to create a new scratch track for the singers.
4 – Adding the vocalists and sax
This rhythm section rough mix was now ready for our singers Maureen, Sue, Lara, Janice, Pam and Dolly to add their parts.
These gals are so amazingly in sync that they were able to phrase perfectly with each other! Mind you, they could not hear each other’s singing! All they had in their headphones was the rhythm section.
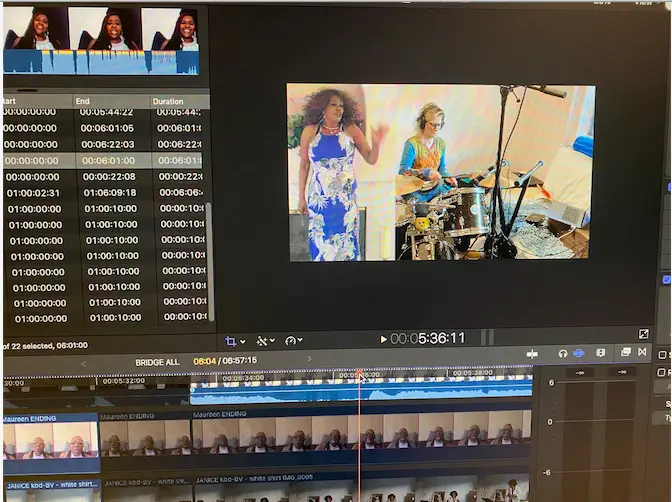
Wolf then mixed the audio (which of course, arrived in varying degrees of quality, given the situation) and I assembled the videos in Final Cut.
Tips for recording a remote video if you’d like to try this:
- Lining everything up is always the hardest part. When recording themselves, ask your mates to wear headphones so you get the instrument or vocal as clearly as possible.
- Make sure everyone records video and audio at the same time as a single track from beginning to end. I told the ladies: Imagine we are all on stage together! This means you only have to align once and not every single snippet.
- Ask everyone to submit video with sound, even if they plan to submit a higher quality audio file separately, as well. Some might think its better to delete the video audio so there is no confusion on which audio to use. Don’t. You need the video audio for aligning, even if the quality is not as good.
- It helps to ask your bandmates to clap along with the count in. Essentially, that’s a down-and-dirty substitute for having an actual clapperboard, like this:

You need one definite point to sync audio and video. Without that, it’s hard to align a free-flowing vocal to the right spot in the audio or an amorphous “ooh” or “aah” with moving lips in the video.
- If someone has a better audio set up, ask them to refrain from applying any effects. Compression, reverb and other effects are best applied in the final mix so as to create a more believable and unified “room” sound.
- Decide on a sample rate if someone will submit pro audio.
Challenges for a remote video compilation are many –
- Heads will be different sizes and you want them to look sort of the same so it looks more natural, as if we are all in the same room.
- You will get various video sizes (iPads, iPhone…) so “crop” and “transform tools” will become your best friends.
- Various layouts (landscape versus portrait) make sense for different instruments, but create more challenges trying to place people into the same “space”.
- Use zoom sparingly, but effectively. I loved giving Janice’s high note at 4:06 a visual boost by slowly zooming in on her over the duration of the note. It gets a bit blurry, but I still went for it.
- Apply color correction to the various takes.
- If you get video in various formats, use a free program like Handbrake to convert accordingly. This can also fix frame rate issues. (One iPhone video came to us very jumpy. Converting it to 25fps did the trick.)
All the above can interfere with what you’d like to do creatively. Sometimes people move slightly out of the cropped space or the co-quarantine buddy who was nice enough to record the video pans a bit to the ceiling or starts dancing along so it all gets a bit shaky.
On the flip side, all these limitations provide charm and realism, so embrace them!
When you do cuts, do them with the music. When I start, I like to mark out all places that make musical sense. In the ending section, for example, it was fun to do a lot of cuts. In earlier sections, I wanted to feature as many of the singers and musicians as I could fit. And I also liked introducing everyone via a full screen shot just for a moment in the beginning to give them a turn in the spotlight.
Your turn!
If this idea of a remote video collaboration inspires you, go for it. It sure is a great way to bridge the gap until we can get back to live rehearsals and shows again!
Include a donate button for your favorite non-profit if you are so inclined. If you don’t have one, the ladies at Next Door Solutions do amazing work, please consider it. It means a lot! Here is how to do that from your band’s page.
And please, consider making a donation to nextdoorsolutions.org. As you can imagine, victims of domestic violence are having a particularly difficult time during this shut-down. Next Door Solutions offers vital and much neededhelp for these victims.
Other multi-cam videos I’ve done or been part of:
“Best Friends” – Collaboration for Marleaux
Here are two Bach videos where I multiplied myself and played both parts